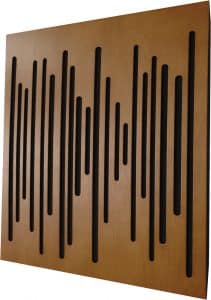
If you are a bedroom music producer and would like to know how you can improve your listening environment in a cost effective way. Learning to make your acoustic panels and bass traps can go a long way in improving the acoustics of your room.
When compared to having no acoustic treatment vs some acoustic treatment. Even a little goes a long way.Creating a D.I.Y acoustic treatment for your room can even greatly improve the sound quality of your recordings.
Acoustic panels and bass traps are two essential components of an acoustic treatment plan. They work together to absorb sound waves and prevent unwanted reflections and resonances. In this article, we’ll discuss how to create D.I.Y acoustic panels and bass traps appropriate for your specific room dimensions.
Acoustic Panels
Acoustic panels are flat, lightweight structures that are designed to absorb high-frequency sounds. They can be mounted on walls or ceilings and come in various shapes and sizes. Here’s how to create your own DIY acoustic panels:
Materials:
- Fiberglass insulation or rock wool
- Wood paneling or acoustic foam tiles
- Fabric (sound-transparent)
- Spray adhesive
- Staple gun
- Saw
- Gloves, goggles, and dust mask
Steps:
- Measure the dimensions of the wall or ceiling where you want to mount the acoustic panel.
- Cut the wood paneling or acoustic foam tiles to the desired size.
- Cut the fiberglass insulation or rock wool to the same size as the wood paneling or acoustic foam tiles.
- Use spray adhesive to attach the insulation to the back of the paneling or tiles.
- Cut the fabric to the same size as the paneling or tiles, leaving a little extra to wrap around the edges.
- Use a staple gun to attach the fabric to the back of the paneling or tiles, wrapping it around the edges and pulling it taut.
- Mount the panels on the wall or ceiling using screws, picture hangers, or
 hooks.
The benefits of acoustic panels :
Bedroom producers often have to deal with poor acoustics, which lead to poor judgements about the quality of their work. Reducing the amount of interference from a room greatly helps them hear their work better.
A large part of the audible spectrum can be controlled using just acoustic panels.
Bass Traps
Bass traps are designed to absorb low-frequency sounds and are typically placed in the corners of a room. They come in various shapes and sizes, but the most effective bass traps are triangular or cylindrical. Here’s how to create your own DIY bass traps:
Materials:
- Fiberglass insulation or rock wool
- PVC pipe or wooden dowels
- Fabric (sound-transparent)
- Spray adhesive
- Staple gun
- Saw
- Gloves, goggles, and dust mask
Steps:
- Measure the dimensions of the corner where you want to mount the bass trap.
- Cut the PVC pipe or wooden dowels to the desired length. The length of the pipe/dowel will depend on the dimensions of your room and the frequency range you want to target.
- Cut the fiberglass insulation or rock wool to the same length as the pipe/dowel.
- Wrap the fiberglass insulation or rock wool around the pipe/dowel and secure it with duct tape or wire.
- Cut the fabric to the same length as the pipe/dowel, leaving a little extra to wrap around the edges.
- Use spray adhesive to attach the fabric to the fiberglass insulation or rock wool, wrapping it around the edges and pulling it taut.
- Mount the bass traps in the corners of the room using screws, picture hangers, or hooks.

The benefits of bass traps :
Music that utilizes very tight low end requires a production space that is free from acoustic resonances. Bass traps help address this issue and provide a more accurate listening experience.
When creating DIY acoustic panels and bass traps, it’s important to consider the specific dimensions of your room and the frequencies you want to target. In general, larger rooms and higher frequencies require more acoustic panels, while smaller rooms and lower frequencies require more bass traps. By following the steps above, you can create a customized acoustic treatment plan that’s appropriate for your room and your specific recording needs.

